Demo(Generate Random CSV)
The following are the steps to use the tool's Generate Random CSV feature. Using this feature, a dataset can be generated that has the attributes that have been specified by the user and the dataset will contain the number of tuples that have been specified by the user and each tuple will contain values from the domain of values specified for each of the attributes.
Step 1
Click on Launch Tool button on the homepage
Click on the Add Attribute button to add the attributes, the attribute type and the domain values
For the purpose of this demo, we will be adding the following attributes that are shown in the image below:
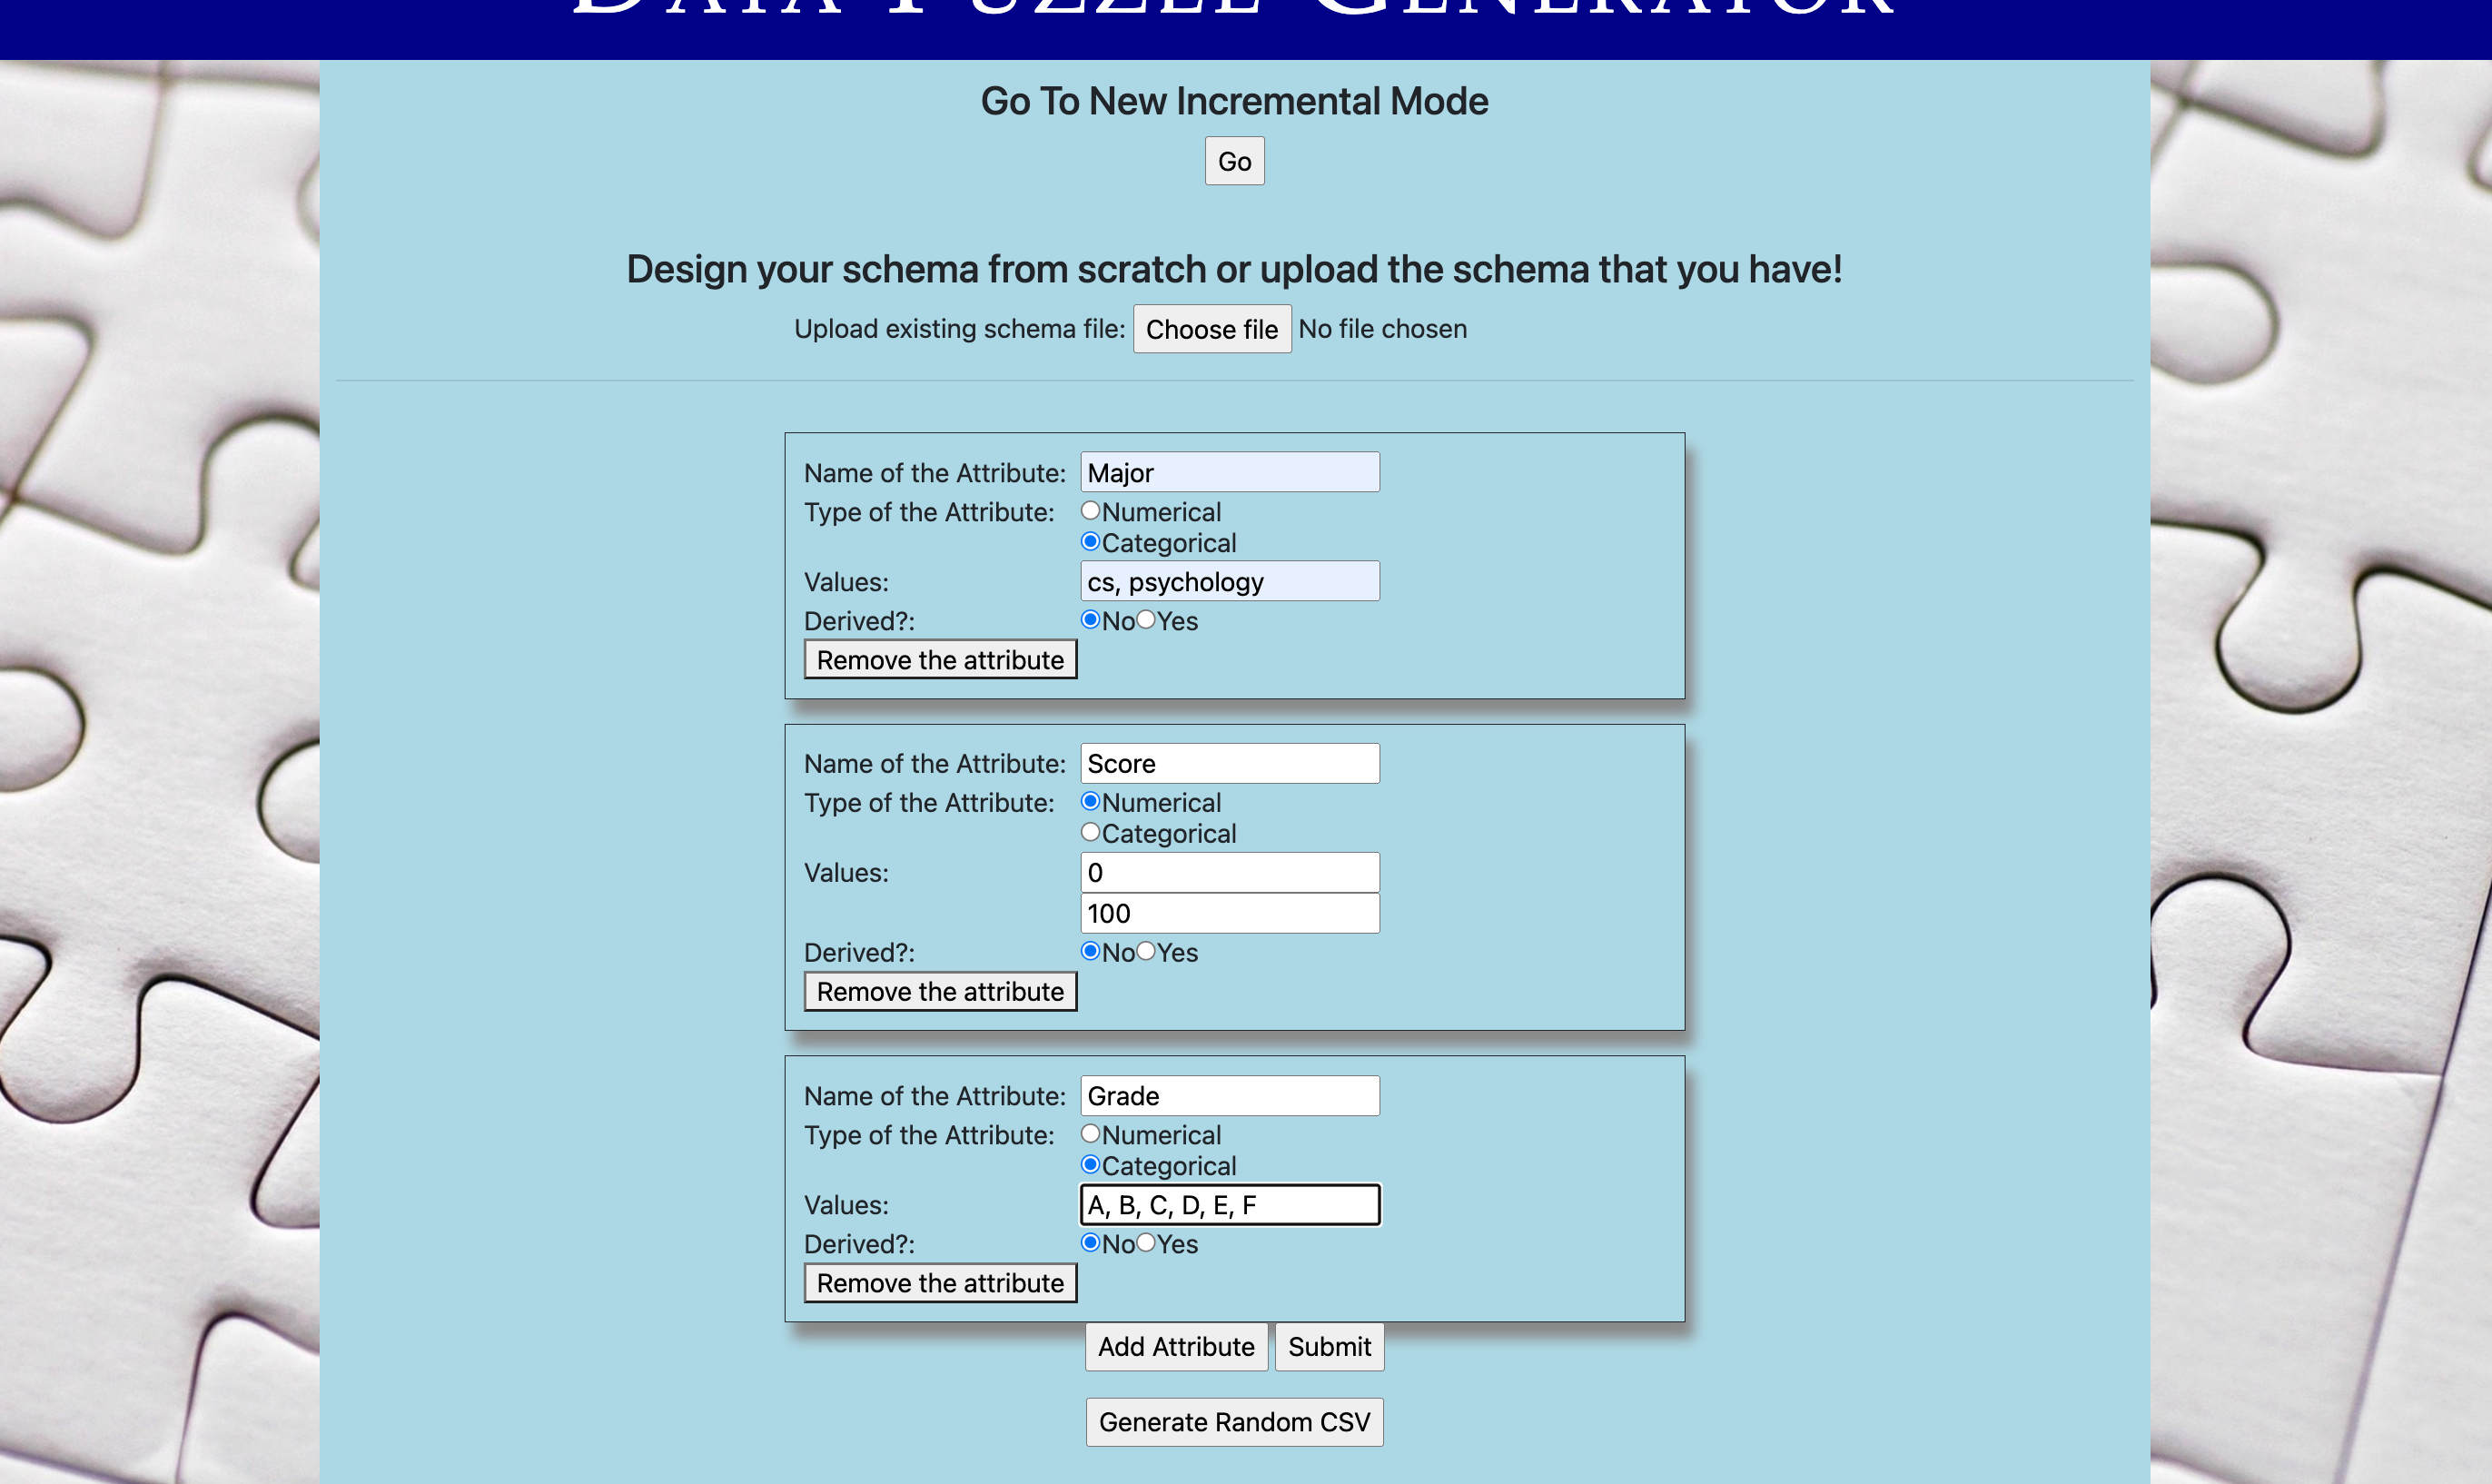
Now, click on "Generate Random CSV" button. The following page appears

Now, we need to specify the file name and the number of tuples
Lastly, click on the Generate Random CSV button to generate and download the randomly generated CSV
Demo(New Incremental CSV)
The following are the steps to use the tool's Incremental CSV Feature by uploading a dataset(CSV file) as a table in MYSQL database and then using SQL queries to set rules in the dataset and then finally downloading the updated dataset back as a CSV file.
Step 1
Click on Launch Tool button on the homepage
Click on the Go button to go to the New Incremental CSV page
Our first step is to upload a CSV which we will call the primary file. A second auxillary file can also be uploaded if required.
We will be using the file Moode_shortened.csv for the purpose of this demonstration
Once the file is uploaded the attributes(column headers of the csv) are listed in the drop down.
Now we need to select our target variable and it's type depending on whether it is a categorical attribute or a numeric attribute.
In the image shown below: Attribute "Grade" has been selected as the target attribute and it's type is "Categorical Attribute".
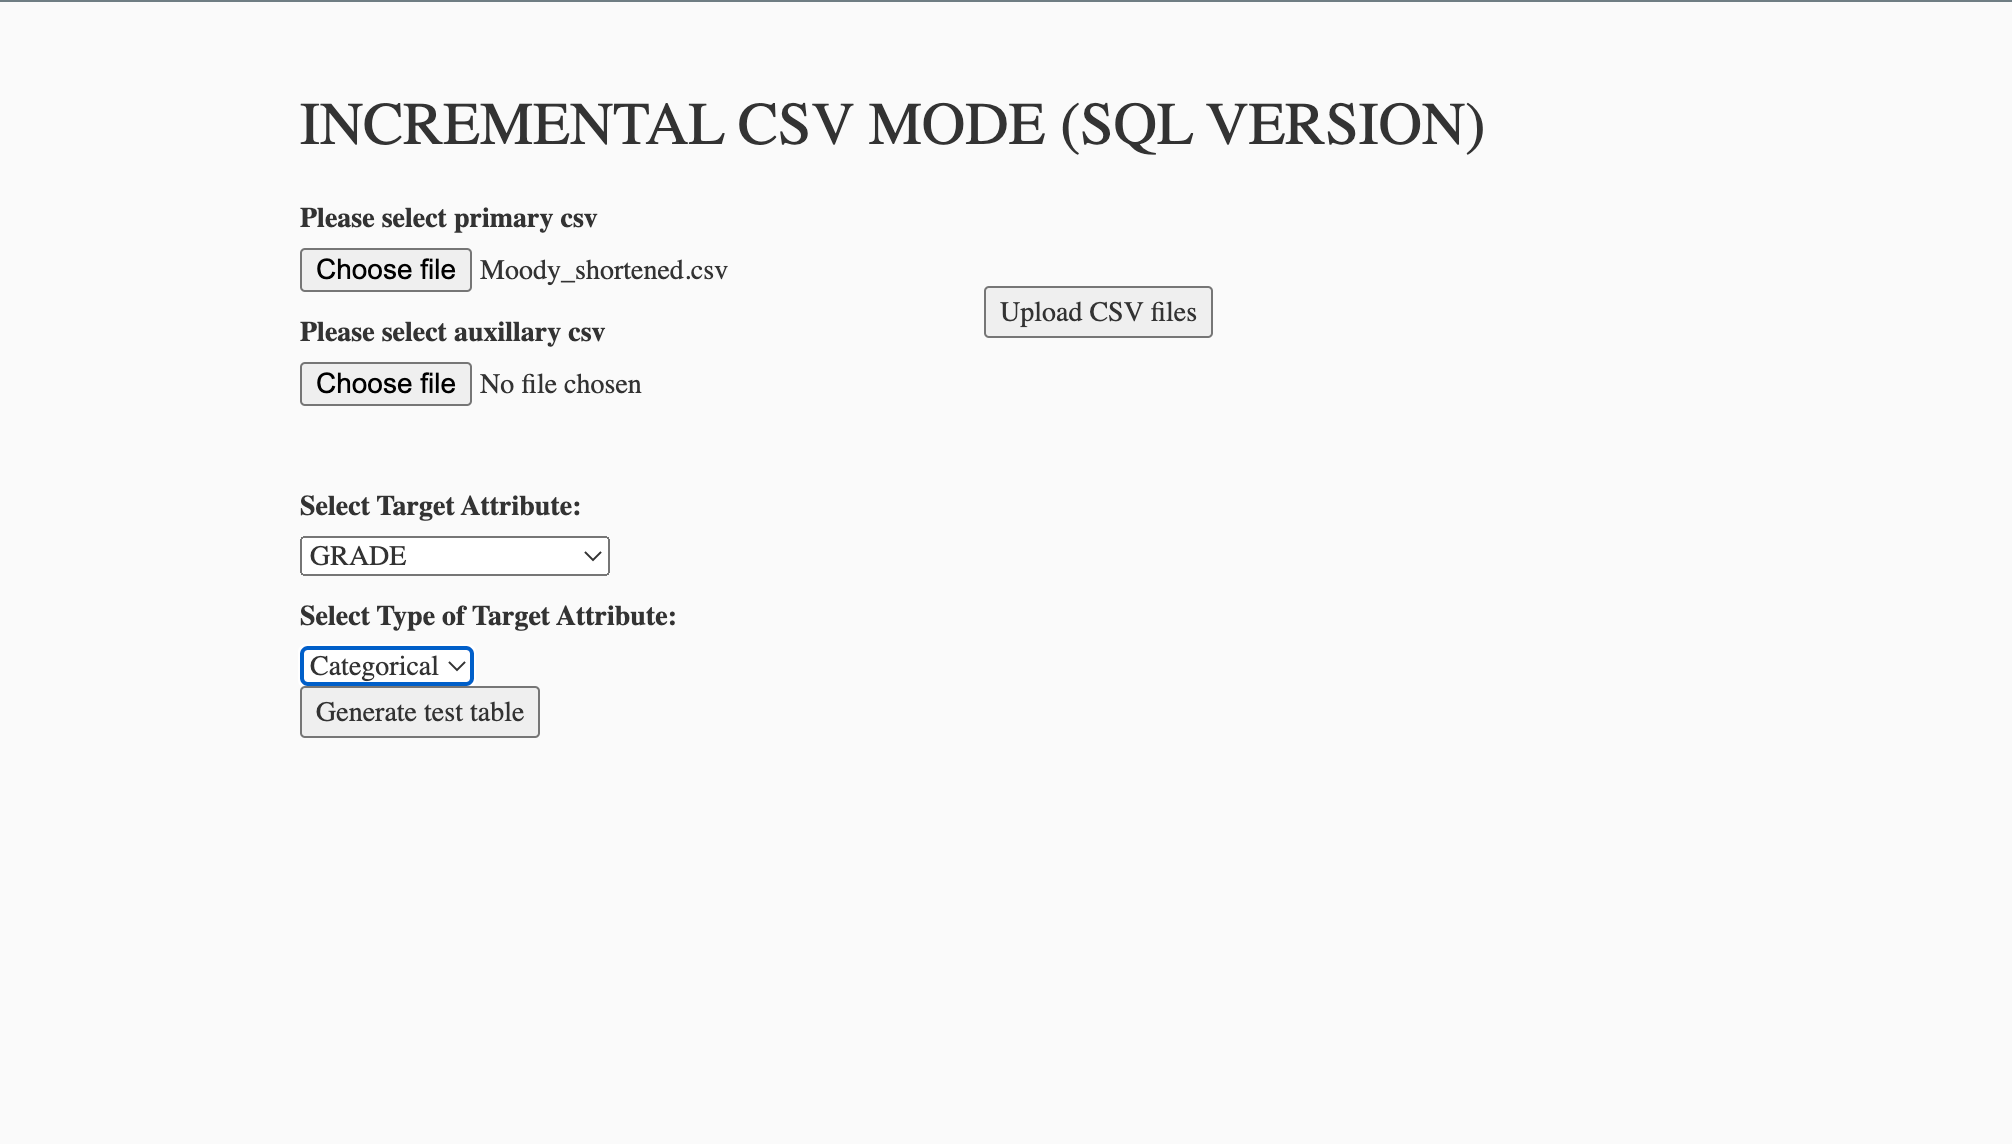
Now, click on "Generate Tables" button.
Step 2
Once the "Generate Tables" button has been clicked we see a page as shown in the image below
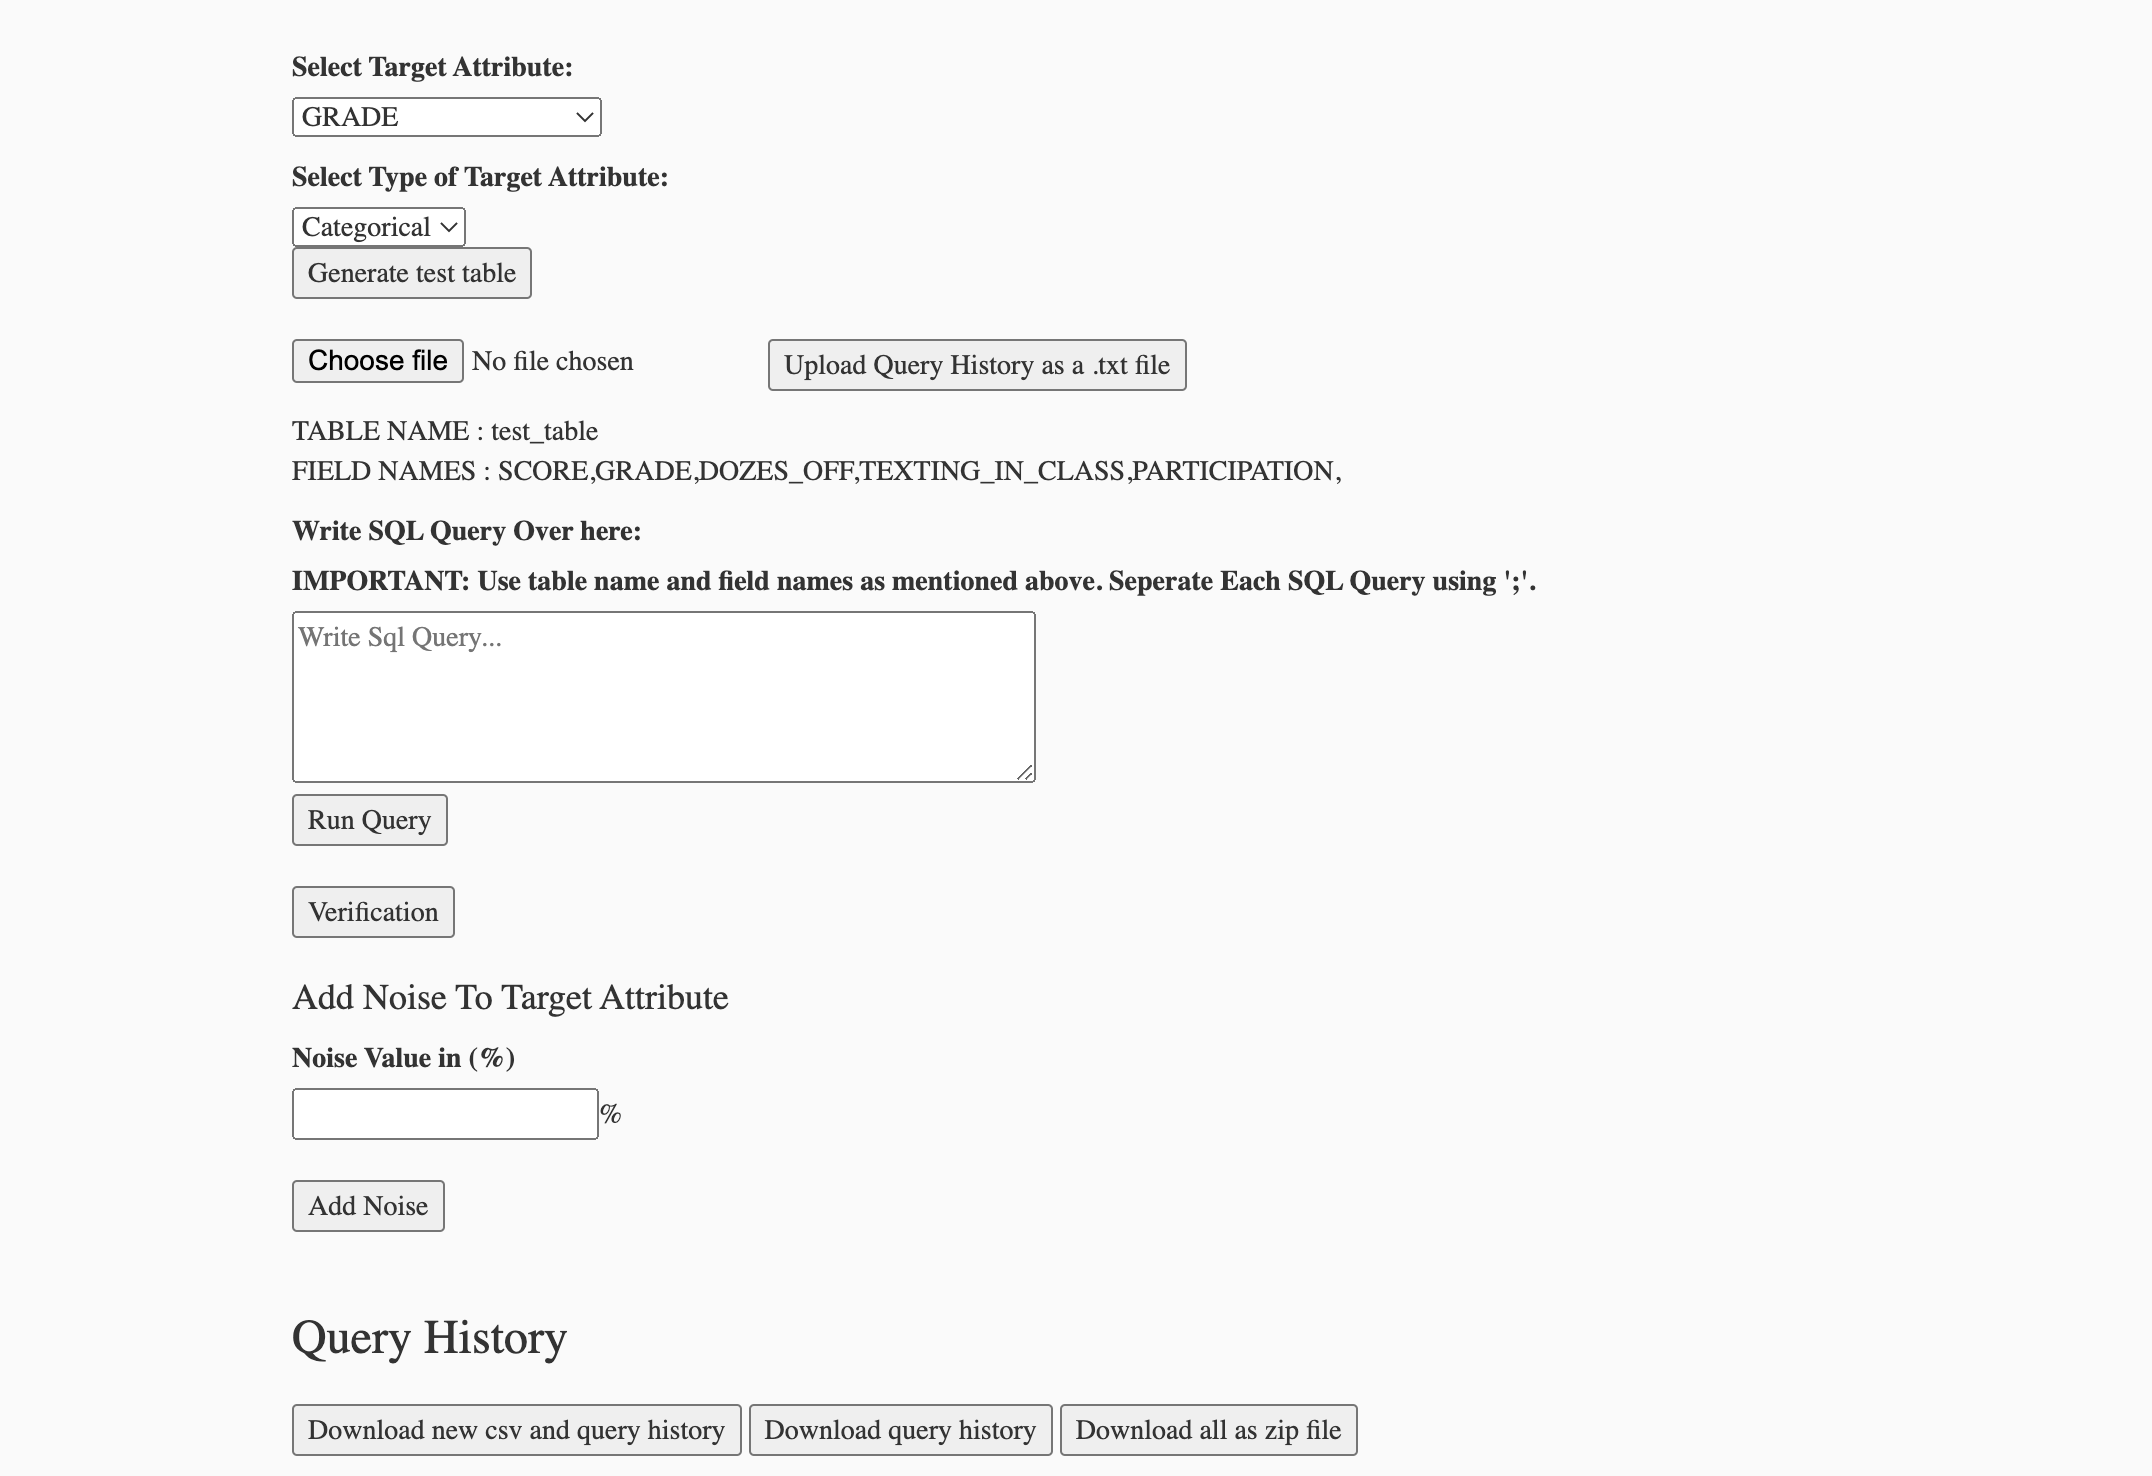
Now, as shown in the above image, the name of the table(s) in the database along with their column names have been displayed.
We can write the SQL queries in the query box provided: Say we write "UPDATE primary_table set GRADE = 'A' WHERE SCORE >= 75; UPDATE primary_table set GRADE = 'F' WHERE SCORE < 50;". Now, on pressing the "Run Query" button the queries will be executed and result of the execution are displayed under the Query History. This is shown in the image below
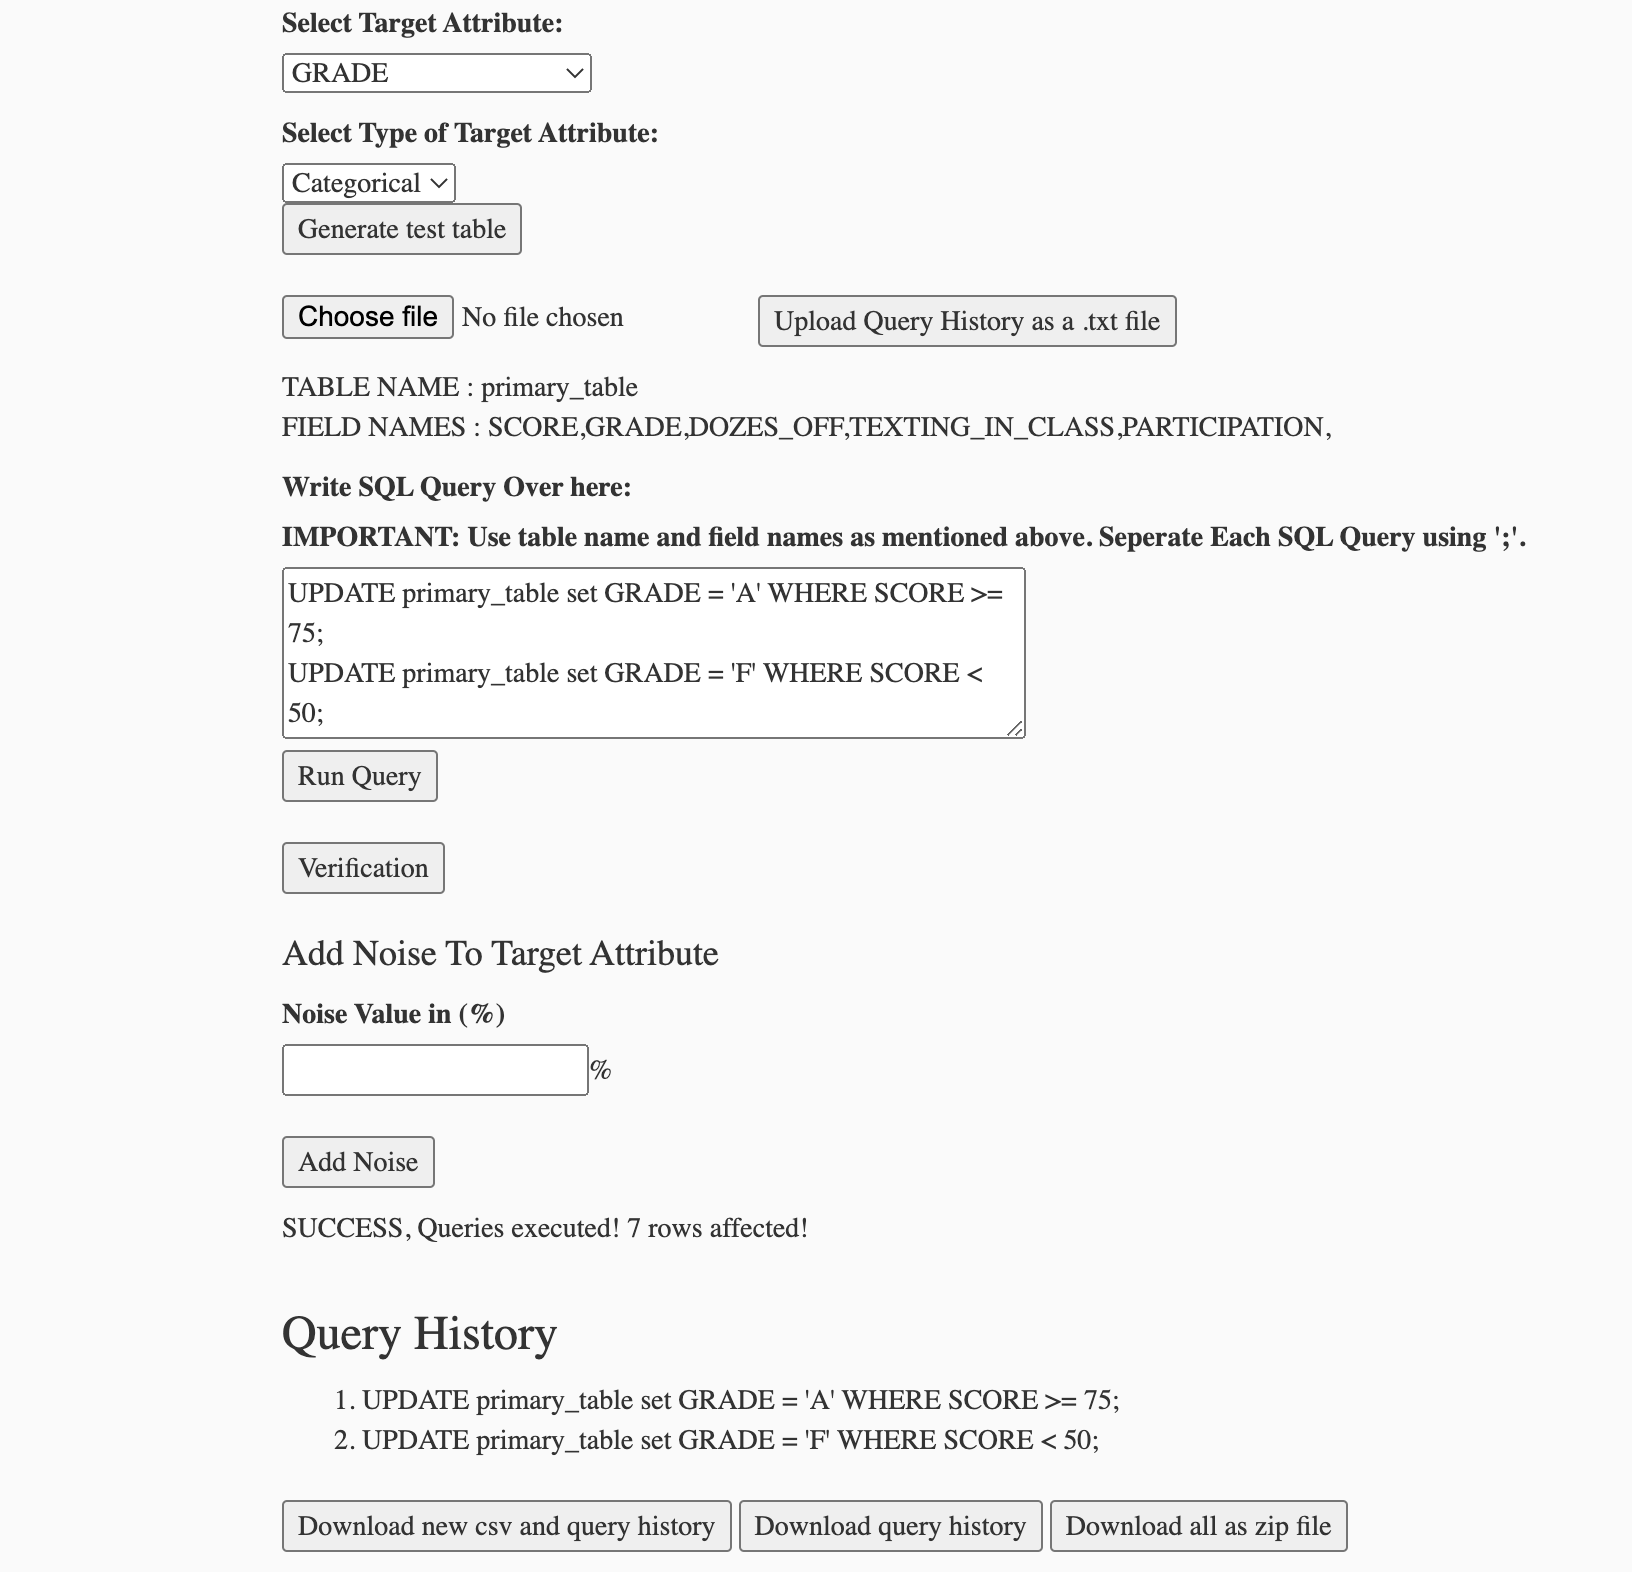
Now, if needed then we can add noise to our data. Say we add 5% noise. Then it will again display the number of tuples that were affected.
Step 3
Now, click on verification to know the percentage of tuples that were not affected by the queries that were executed earlier.
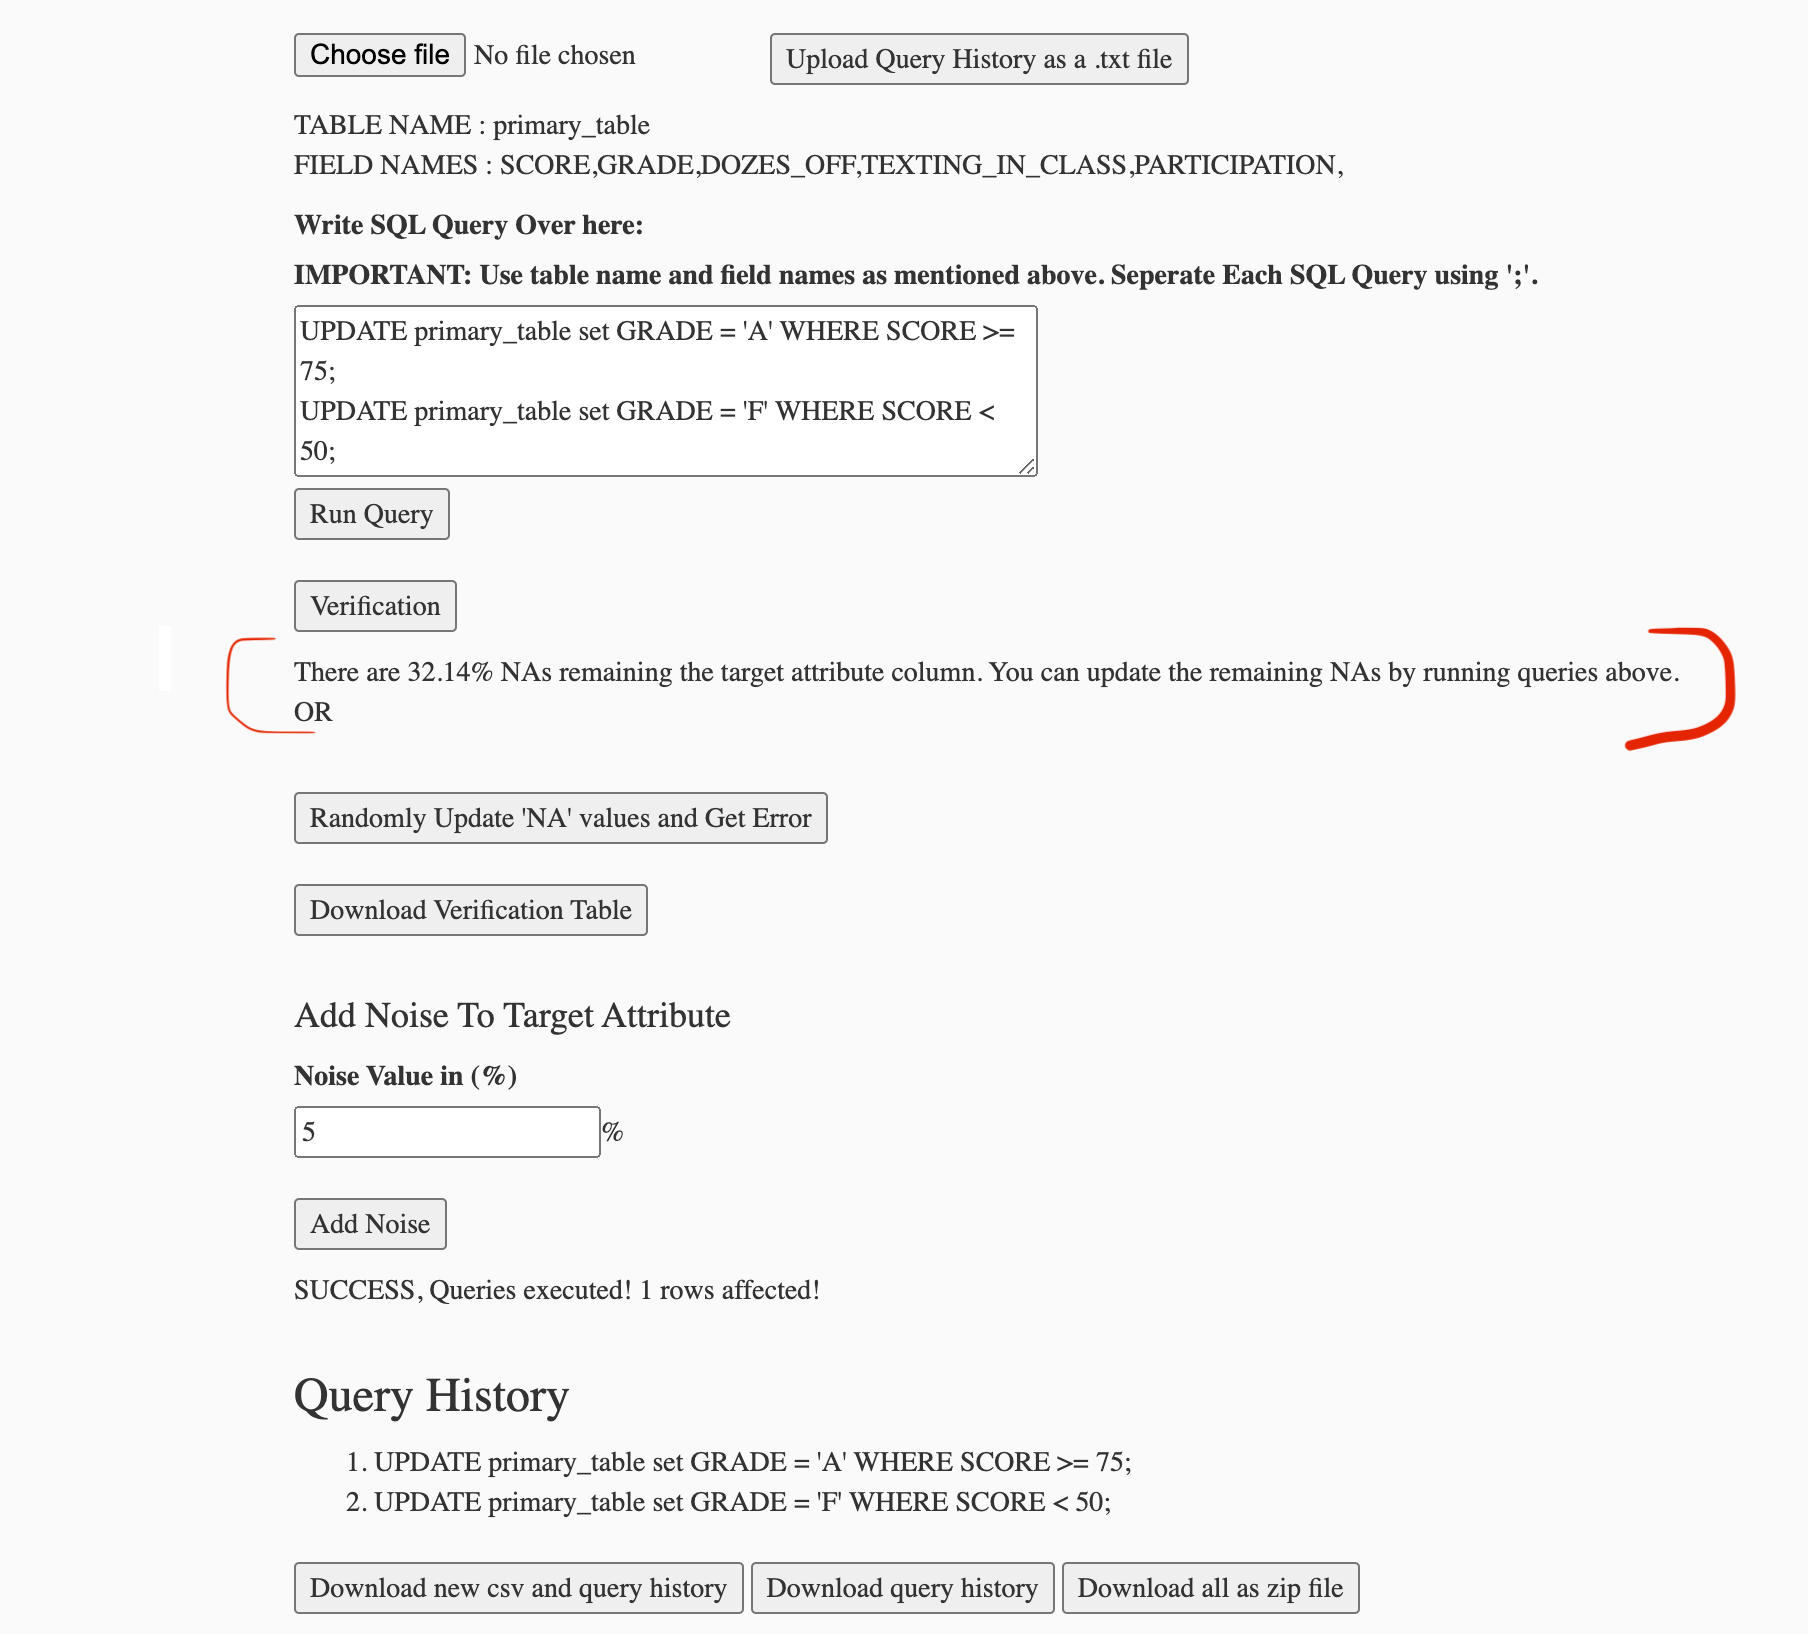
Now, we have two options we can either continue to write queries to keep updating the tables or we can randomly update the unaffected values and get the error percentage.
Now, we can use one of the three download buttons
1. Download new csv and query history - This downloads the data set that we have created and the queries that were executed to create it.
2. Download query history - This downloads the queries that have been executed till now as a text file.
3. Download all as zip file - This downloads the newly created dataset, the query history and the original csv file as a single zip file.